Nodes are a powerful Blender feature, allowing you to change how your scene renders, to combine images and videos, and to do many types of special effects. Compositing is a critical part of the video production process. The purpose of this video is to make you comfortable moving around in the Node Editor and to introduce a some basic image effects.
Let's delete the default cube and have fun with Suzanne. So highlight the cube (right click), press X to delete and Enter to confirm. Then add Suzanne (space-add-mesh-monkey). Press F9 to go to the Edit buttons. Press the Set Smooth button to make her look a bit more presentable. Add a red material by pressing F5 (Shading), then the Add New button to add a new material. Set the R to 1, the G to 0, and the B to 0.
To set up node based rendering, press F10 to go to the Scene buttons. In the Anim panel, press the Do Composite button. When you do this, instead of the scene rendering, the result of your composite node processing renders when you press F12.
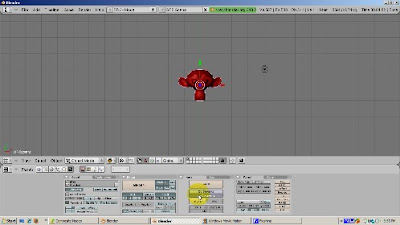
To go to the Node Editor, change the View type to Node Editor. Blender supports material nodes and texture nodes as well as composite nodes. To enable Composite Nodes, click the Face icon. Then, click on the Use Nodes button.
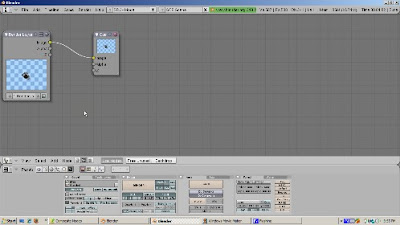
Two puzzling rectangular objects display. On the left is the Render Layers node. On the right is the Composite node. You can resize a node by clicking on the lower right part of the node and dragging. The nodes are connected by a black wire, from the yellow Image button on the right side of the Render Layer node to the yellow Image button on the left side of the Composite node. What's going on?
Composite nodes really have three types, Input, Output, and different types of things you might do to the input before you render the output. Think of compositing as similar to going to the barber shop. Your head, before you get your haircut, with unshaven and with unkempt hair, is the input. The barber can do a number of things - give you a shave, wash your hair, cut it short, and so on. These are like processing nodes. The end result - the output - ends up in the Composite Node. The first big rule of compositing is: There Can Only Be One Composite Node.
The Render Layers node is the input - your scene before anything is done with it. The Composite node is the result. Node setups can get very confusing. The easiest way to set them up is to place the input nodes (there can be more than one, because we might combine things, such as a scene with an image), on the far left, and the output node, the Composite node, to the right. The processing nodes are in the middle, best placed in logical order from left to right.
Move the Composite node all the way to the right. Moving is similar to moving in the 3D window. Press the Right arrow key to select the Composite node, then drag it all the way to the right. The wire follows along.
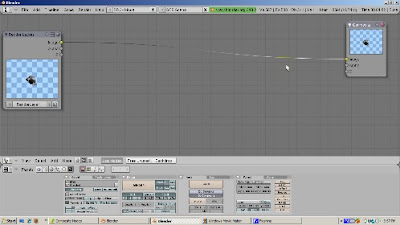
Press F12 to render. Suzanne renders as if there was no compositing active. You also see a thumbnail of the rendered scene both in the Render Layers node and the Composite node. That's because this is like walking into the barber shop, seeing the long line, and walking out. Nothing was done.
OK. Let's do some stuff to Suzanne. How about making her 3 times bigger? Easy. Instead of going back to the 3D view and scaling her up, you can do it in the Node editor. Add a Scale Node (Space - Add - Distort - Scale). Nothing happens yet. You need to connect the wires. To do this, connect the Image socket (that's the yellow Image dot) on the right side of the Render Layers node to the Image socket on the left side of the Scale node. This tells the Node editor to pump the scene, with Suzanne, into the Scale node. Set the X and Y values to 3, to indicate how large to scale Suzanne.
Next, connect the Image socket on the right side of the Scale node to the Image socket on the left side of the Composite node. This tells the Node editor to take the new, larger Suzanne, and add it as input to the Composite node. Look at the image on the Composite node. It already shows the bigger Suzanne. If you press F12 to render, Suzanne also renders larger.
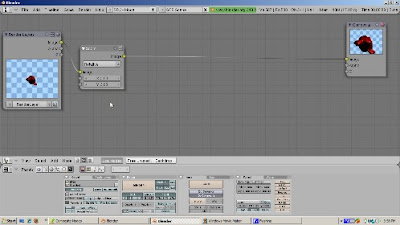
That's a good start. How about flipping her upside down? Easy. Add a Flip node (Space - Add - Distort - Flip). Connect the Image socket on the right side of the Scale node to the Image socket on the left side of the Flip node. From the dropdown, select Flip X & Y. Now connect the Image socket on the right side of the Flip node with the Image socket on the left side of the Composite node.
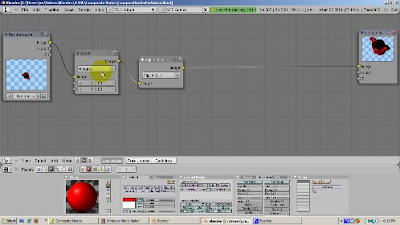
The path is clear. Suzanne is scaled and then flipped. You can see each step. By the way, the 3D view hasn't changed. Suzanne is still her old self. Change to 3D view, look, and change back to the Node editor.
The Viewer node, another type of output node, lets you view Suzanne's progress. To add a Viewer node, press Space - Add - Output - Viewer. Automatically, the Viewer node is connected, via the Image socket, to the last node selected. A handy button is the Use Backdrop button, which displays the most recently selected Viewer node. You see Suzanne both scaled and flipped.
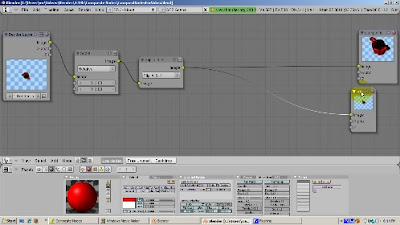
We can see Suzanne after she was scaled but before she was flipped. To do that, cut the connection between the Flip node and the Viewer node by pressing the left mouse button and dragging across the wire. Then, connect the output Image socket of the Scale node to the input Image socket of the Viewer node. Now Suzanne is scaled but unflipped.
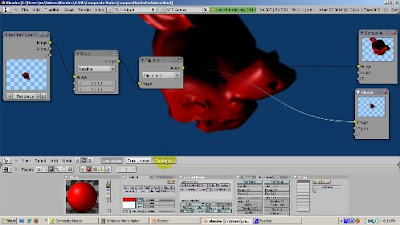
Click the Backdrop button to get the regular background. Let's blur Suzanne, giving the illusion of fuzziness. Blur is a filter node. So press Space - Add - Filter - Blur. Connect the Image socket on the right side of the Flip node to the Image socket on the left side of the Blur node. Set X and Y to 10, specifying the blur amounts. Then connect the Image socket on the right side of the Blur node with the Composite node's image socket. Click the Backdrop button.
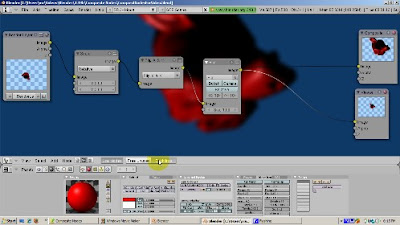
Now let's make Suzanne black and white. Add a Converter node to do that (Space - Add - Converter - RGB to BW). Convert the Image socket on the right of the Blur node to the Composite Node image socket.
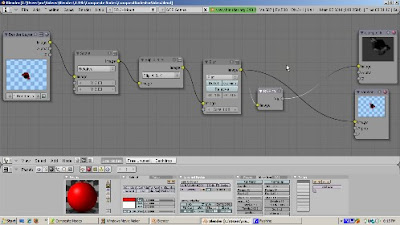
Many of the keys you are familiar with in navigating the 3D window work in the node editor. Right click selects a node. Shift Right click on another node extends it. X deletes the selected nodes. Control-Z corrects your error.
You can group nodes when you have a lot of them. Let's say you really like to scale, flip, blur, and make objects black and white. You can create a group out of these nodes. Select all of them press Control-G. You've created a nice node group, cleaning up the diagram a lot. Node groups can be copied and even exported to another blend file, which is nice because you won't have to redo all those steps each time. The tab key shows the nodes in the group. If you change your mind, Alt-G undoes the grouping.
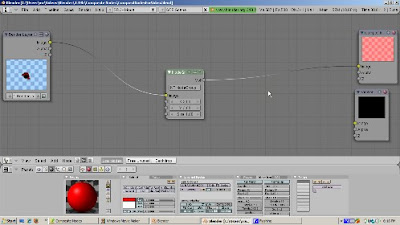
To summarize, we've enlarged Suzanne 3 times, flipped her over, blurred her, and got rid of her red color - all without touching the underlying 3D view, which you can see in the Render Layers node. This just scratches the surface. I hope this gives you a good start on compositing nodes in Blender. Happy Blendering!