Join my Blender 3D forum, where you can network with other Blender friends and get your Blender 3D questions answered.
The purpose of this video is to show how to edit an image in the UV / Image Editor in Blender 2.49b. Editing an image with the UV / Image Editor is important when you're combining (the technical word is "compositing") images and objects into a final render, as well as for creating custom textures. The process involves mapping a 3D surface onto one or many 2D images, a process called UV unwrapping a mesh. The mapping is done on each face. It's possible for each mesh face to have its own image mapped to it. We'll start with the simplest case of UV unwrapping, unwrapping an image onto a plane, which has, of course, only one face. We'll work our way up from there.
1) Erase the default cube (right click on the cube, then press the Delete key, then Enter). Add a plane (Space - Add - Mesh - Plane). Scale it up 3 times (S - 3 - Enter). Split the window horizontally by right clicking on the 3D Window bottom border, choosing Split Area, and positioning the double arrows so that the window is split.
2) We're going to play with a picture of me, in front of one of the 26 palaces of the King of Morocco, in Rabat, Morocco, projected onto a plane. It's good to be the king. Select the plane. Tab into Edit Mode. Press the A key twice to make sure that all the vertices are selected. Press the U key to unwrap the plane. Choose the default Unwrap method. The result: after you unwrap the plane, in the UV / Image Editor you should see a square with 4 vertices - actually, it's a face.
3) The next step is to load my image. From the UV / Image Editor, select Image, then Open. Select the Image. You might need to use the Zoom In and Zoom Out keys (Num+ or Num-) to position the image so that it fills up the square. There's the picture. In the background are soldiers, in their typical position before the Morrocan Changing Of The Guard.
4) The next step is to get my picture to display, both on the plane in the 3D view, and in rendering the image. We want the camera to see the image projected on a flat plane. To do that, from the View menu, press Align View, then Align Active Camera to View, or press Ctrl - Alt - Num0. Press F12 to render. The plane renders right now with the default gray material.
5) To get my picture to render, we need to tell the renderer to use the texture face (TexFace), which is the image from the UV / Image Editor. To do that, go to the Shading buttons (F5), select the default material (Material). Then, turn on the TexFace button. Now Press F12 to render. A bit better, but the image is upside down. We'll fix this shortly.
6) To see my image on the plane, go to View Properties. Turn on the SolidTex button. If the image still doesn't display, make sure the 3D View is in Solid mode. Now you can see me, upside down, as in the render. How can we fix this? In one of two ways...either by rotating the image in the 3D view or rotating the image in the UV / Image Editor. We're not going to change the geometry in the 3D view. We'll fix it in the UV / Image Editor. To do that, with all the vertices selected, press the R key, then rotate it 180 degrees. You can hold the control key down when you're close to 180 (you can see the rotation at the bottom of the UV / Image editor). That way you get exactly 180 degrees.
Press Enter and the image is now correct, both in the 3D view and the UV / Image Editor.
7) The entire image doesn't have to be mapped to the plane. To show that, go to the UV / Image Editor, with all the vertices selected. Press the S key to scale. Reduce the square to a rectangle syhowing only part of the image. I'm scaling the square down to a rectangle which focuses more on me than on the palace. The square is now a tall rectangle. Press F12 to render. Gee, I gained some weight. Moroccan food can be fattening, I guess.
8) The reason for the weird result is that, although the plane starts out mapped to a square area on the image, when I scaled it down, it became wrapped to the rectangle. The rendering stretched my stomach out, to fill in the plane's square area. That is the problem with UV unwrapping. Each face is mapped in its own way to an area of the image. The way that you unwrap a mesh makes a big difference. I'm going to show you how it can get even more weird. Press Ctrl-Z to undo the edit. That's the fastest diet on record.
9) We can do much finer edits, simply by adding more faces to the plane. To do this, position the cursor inside the 3D view. Press the W key to bring up the Specials menu. Select Subdivide Multi. Make the number of cuts 5. Of course, it can be any number you want. This gives us a 6 x 6 grid, with 36 faces in total. Go into Face Select mode by clicking on the triangle icon. Press the A key to deselect everything. Select a face in the 3D view. In the UV / Image editor, you see both the loaded image, and the part of the image that is mapped to that particular face.
10) Let's see what those guards are really doing. Easy enough. Select the faces that map to the part of the image where the guards are. Press the S key to scale them up a bit. Press F12 to render. They have really neat uniforms, don't they?
11) We can also edit from the UV / Image Editor. Position the 3D cursor in the UV / Image Editor. Box Select the area mapped to my shoulder. Press the R key to rotate it a bit. Now I'm bending my body in a strange way. Press F12 to render.
12) To show you why the projection method makes a difference, I'm going to unwrap the plane based on the Sphere from View projection. The result is as if both me and the King's palace were put through a blender which, in a sense they were. Thank God for Ctrl-Z.
You should play with all the different projection methods in Blender. A cube projection of an image actually will work fine. You can unwrap it and then scale the UV squares to fit the image. You can unwrap as many times as you like. Each unwrap undoes the previous one. However, you can have multiple unwraps if you want. The way to do that is to create a new texture map. The default name is UVTex. Click New and unwrap - the default name is UVTex.001, which you can change - and you can experiment with different unwrappings.
I hope this gives you a start in using the UV / Image Editor. Be sure to hit the Youtube Subscribe button so you won't miss any of my tutorials. Happy Blendering.
Showing posts with label images. Show all posts
Showing posts with label images. Show all posts
Monday, January 4, 2010
Sunday, December 6, 2009
Rip Tool
Join my Blender 3D forum, where you can network with other Blender friends and get your Blender 3D questions answered.
The Rip tool lets you tear out a hole, such as a mouth or an eye socket if you're modeling a face, in your mesh. You can use the Rip Tool in either vertex select or edge select mode. The Rip Tool does not work in Face Select Mode. You can also use the Rip tool to do split apart a mesh, for example, splitting a sphere into two halves. You can create faces to join the parts of the mesh that you have ripped. The goal of this tutorial is to make you comfortable both ripping a mesh apart to create holes where you want them, and to join mesh parts together again.
We'll start with the default Blender 2.49b scene. Delete the default cube (press the Delete key and press Enter to confirm). Add a plane (Space - Add - Mesh - Plane). The plane is in Object mmode. Scale the plane to 4 times its original size (S - 4 - Enter). Get rid of the 3D Transform Manipulator to make the demonstration of the Rip Tool easier to follow.
Press Tab to go into Edit mode. Press the Edit buttons (F9) and click the Subdivide button 3 times. Press the A key to deselect all vertices.
Look at the indicators for vertices, edges, and faces. Right now, the plane has 81 vertices, 144 edges, and 64 faces. The zeroes show that nothing is selected.
Make sure you are in Vertex Select Mode (Control - Tab - 1) or the Vertex Select icon. Position the 3D cursor below and to the right of the vertex you want to select. Select the vertex, then press the V key, grabbing the vertex to the right. A hole is created to the right of the vertex. Look at the indicators for vertices, edges, and faces. Before the plane had 81 vertices, of which none were selected. Now, the plane has 82 vertices, and one is selected.
This gives a clue as to what the Rip tool actually does. It creates a duplicate vertex at the same spot as the selected vertex, connected to the vertices as the copied vertex. When the mesh is ripped, that vertex drags the adjacent edges with it. The 3D cursor position determines the direction of the rip.
Press Alt-U, which brings up the Undo History. Click on Select to undo the rip. Now we're back to having the vertex selected, with 81 vertices altgether. Move the cursor above and to the left of the selected vertex. You can constrain the rip to an axis. To do that, press the V key, and then the Y key to constrain the rip to the Y axis. Press Enter to confirm. So you can see that the direction of the rip depends on the position of the 3D cursor at the time that you press the V key. The rip is along the edge that is closest to the selected vertex.
Press the A key to deselect the vertex. Go to another part of the plane, and select a vertex. Then Shift select (Shift - Right Click) the vertex immediately to the right of it. Position the 3D cursor above and in the middle of the selected vertices. Press the V key. You now get a bigger rip, a trapezoid, with 2 vertices on top and 4 vertices on the bottom. So a rip with N selected vertices produces a ripped polygon with N vertices in the ripped direction and N+2 vertices in the original direction.
If you start the Rip and then immediately decide not to continue, the new vertices still remain. To illustrate this, select a vertex, press the V key, and then press Esc. The vertex created by the Rip tool is still there. You can rip the mesh now even though you pressed Esc. Press the G key and move the vertex and the mesh is ripped. Press Enter to confirm.
Press the A key to deselect all vertices. Suppose you want to patch up the hole that you created. The solution is to select the vertices for the new face (3 or 4) and press the F key. To illustrate this, select the 4 vertices that form the square of the hole created from 2 selected vertices. Press the F key. A face is created.
Press the A key to deselect all vertices. Now we'll create triangular faces for the remaining two holes. Select the 3 vertices forming the left triangle, and press F. Press the A key to deselect everything. Select the 3 vertices forming the right triangle, and press F. The hole is now repaired. Press the A key to deselect.
Ripping via an edge loop is a great way to split a mesh. Select an Edge Loop by positioning the 3D cursor on an edge and pressing Alt-Right Click. Then press the V key and scroll down. Press Enter to confirm. You have now split the mesh along the edge loop.
Rip works in edge mode as well. Go into Edge mode, by either selecting the Edge icon or pressing Control - Tab - 2. Position the 3D cursor above an edge to select. Select the edge (Right Click on an edge). Press the V key. The rip works just like selecting two adjacent vertices, which is, of course, what constitutes an edge.
Press the A key to deselect everything. You rip on two edges along the same loop. Select an unselected edge. Then Shift Select (right click while holding the Shift key) to select the edge next to it. Press the V key. The rip works in the trapezoidal fashion you would expect.
Rip works on other meshes as well. Let's look at a UV Sphere. Press tab to go to object mode. Click the second square to go to Level 2, so we have a blank 3D viewport. Add a UV Sphere (Space - Add - Mesh -UVSphere), accepting the default of 32 rings and 32 segments. Press Z to go into wireframe mode. Scale the UVSphere 3 times (S - 3 - Enter). Press Tab to go into Edit mode. Go into Edge select mode (Control - Tab - 2). Press the A key to deselect everything.
Press Num 1 key to go to front view. Position the cursor on an edge and press Alt-Right Click to select an edge loop. Position the 3D cursor below the selected loop. Press the V key. Move the selected edge loop down. Behold, you have split the UV Sphere. Press Z to go into solid mode so you can see.
Ycu can also rip and scale at the same time. Select another edge loop (Alt- Right Click) for splitting the UV Sphere. Position the 3D cursor below the loop. Press the V key, then the Z key to constrain along the Z axis, drag the edge down. Press Enter. Then press the S key to scale the loop.
I hope this gives you a good idea of the Rip tool, which is very handy for creating holes in a mesh. Happy Blendering!
The Rip tool lets you tear out a hole, such as a mouth or an eye socket if you're modeling a face, in your mesh. You can use the Rip Tool in either vertex select or edge select mode. The Rip Tool does not work in Face Select Mode. You can also use the Rip tool to do split apart a mesh, for example, splitting a sphere into two halves. You can create faces to join the parts of the mesh that you have ripped. The goal of this tutorial is to make you comfortable both ripping a mesh apart to create holes where you want them, and to join mesh parts together again.
We'll start with the default Blender 2.49b scene. Delete the default cube (press the Delete key and press Enter to confirm). Add a plane (Space - Add - Mesh - Plane). The plane is in Object mmode. Scale the plane to 4 times its original size (S - 4 - Enter). Get rid of the 3D Transform Manipulator to make the demonstration of the Rip Tool easier to follow.
Press Tab to go into Edit mode. Press the Edit buttons (F9) and click the Subdivide button 3 times. Press the A key to deselect all vertices.
Look at the indicators for vertices, edges, and faces. Right now, the plane has 81 vertices, 144 edges, and 64 faces. The zeroes show that nothing is selected.
Make sure you are in Vertex Select Mode (Control - Tab - 1) or the Vertex Select icon. Position the 3D cursor below and to the right of the vertex you want to select. Select the vertex, then press the V key, grabbing the vertex to the right. A hole is created to the right of the vertex. Look at the indicators for vertices, edges, and faces. Before the plane had 81 vertices, of which none were selected. Now, the plane has 82 vertices, and one is selected.
This gives a clue as to what the Rip tool actually does. It creates a duplicate vertex at the same spot as the selected vertex, connected to the vertices as the copied vertex. When the mesh is ripped, that vertex drags the adjacent edges with it. The 3D cursor position determines the direction of the rip.
Press Alt-U, which brings up the Undo History. Click on Select to undo the rip. Now we're back to having the vertex selected, with 81 vertices altgether. Move the cursor above and to the left of the selected vertex. You can constrain the rip to an axis. To do that, press the V key, and then the Y key to constrain the rip to the Y axis. Press Enter to confirm. So you can see that the direction of the rip depends on the position of the 3D cursor at the time that you press the V key. The rip is along the edge that is closest to the selected vertex.
Press the A key to deselect the vertex. Go to another part of the plane, and select a vertex. Then Shift select (Shift - Right Click) the vertex immediately to the right of it. Position the 3D cursor above and in the middle of the selected vertices. Press the V key. You now get a bigger rip, a trapezoid, with 2 vertices on top and 4 vertices on the bottom. So a rip with N selected vertices produces a ripped polygon with N vertices in the ripped direction and N+2 vertices in the original direction.
If you start the Rip and then immediately decide not to continue, the new vertices still remain. To illustrate this, select a vertex, press the V key, and then press Esc. The vertex created by the Rip tool is still there. You can rip the mesh now even though you pressed Esc. Press the G key and move the vertex and the mesh is ripped. Press Enter to confirm.
Press the A key to deselect all vertices. Suppose you want to patch up the hole that you created. The solution is to select the vertices for the new face (3 or 4) and press the F key. To illustrate this, select the 4 vertices that form the square of the hole created from 2 selected vertices. Press the F key. A face is created.
Press the A key to deselect all vertices. Now we'll create triangular faces for the remaining two holes. Select the 3 vertices forming the left triangle, and press F. Press the A key to deselect everything. Select the 3 vertices forming the right triangle, and press F. The hole is now repaired. Press the A key to deselect.
Ripping via an edge loop is a great way to split a mesh. Select an Edge Loop by positioning the 3D cursor on an edge and pressing Alt-Right Click. Then press the V key and scroll down. Press Enter to confirm. You have now split the mesh along the edge loop.
Rip works in edge mode as well. Go into Edge mode, by either selecting the Edge icon or pressing Control - Tab - 2. Position the 3D cursor above an edge to select. Select the edge (Right Click on an edge). Press the V key. The rip works just like selecting two adjacent vertices, which is, of course, what constitutes an edge.
Press the A key to deselect everything. You rip on two edges along the same loop. Select an unselected edge. Then Shift Select (right click while holding the Shift key) to select the edge next to it. Press the V key. The rip works in the trapezoidal fashion you would expect.
Rip works on other meshes as well. Let's look at a UV Sphere. Press tab to go to object mode. Click the second square to go to Level 2, so we have a blank 3D viewport. Add a UV Sphere (Space - Add - Mesh -UVSphere), accepting the default of 32 rings and 32 segments. Press Z to go into wireframe mode. Scale the UVSphere 3 times (S - 3 - Enter). Press Tab to go into Edit mode. Go into Edge select mode (Control - Tab - 2). Press the A key to deselect everything.
Press Num 1 key to go to front view. Position the cursor on an edge and press Alt-Right Click to select an edge loop. Position the 3D cursor below the selected loop. Press the V key. Move the selected edge loop down. Behold, you have split the UV Sphere. Press Z to go into solid mode so you can see.
Ycu can also rip and scale at the same time. Select another edge loop (Alt- Right Click) for splitting the UV Sphere. Position the 3D cursor below the loop. Press the V key, then the Z key to constrain along the Z axis, drag the edge down. Press Enter. Then press the S key to scale the loop.
I hope this gives you a good idea of the Rip tool, which is very handy for creating holes in a mesh. Happy Blendering!


Monday, October 19, 2009
2.49b Realistic Bouncing Ball
Download the Bouncing Ball blend file
At first glance, one might think that animating a bouncing ball would be easy, a simple matter of moving a sphere and adding location keyframes. Sure, the ball would move. However, it would not bounce realistically. Because of gravity, the ball moves slower at the top than at the bottom. The ball actually is stretched a bit in the middle of the bounce and squashes when it hits the floor. Because of friction, the height of the next bounce is less than the height of the previous bounce. The spin of the ball must be realistic as well.
We're not going to address all these things. The purpose of this tutorial, which is based on the Blender 3D Noob To Pro bouncing ball tutorial, is to show the basics of animating a bouncing ball, including squashing the ball using lattice deformation and how to use IPO curves to bounce the ball a number of times without redoing the first bounce sequence again and again. I used Blender 2.49B.
We'll start by deleting the default cube (Right click, pressing the X key, and confirming the delete). Then add a UV Sphere (Space-Add-Mesh-UVSphere), accepting the default settings of 32 rings and 32 segments. From the editing buttons (F9), press Set Smooth. Then add a subsurf modifier at level 2. This gives us a nice round ball.
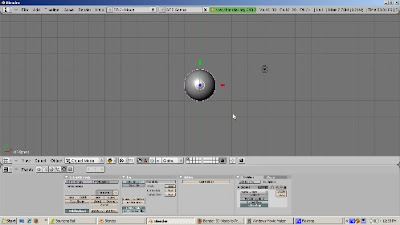
Press Num1 to go into Front View. Add a Lattice (Space-Add-Lattice). Press Z to go into wireframe mode. Select the lattice. Scale the lattice so that the UV Sphere is inside of it, with the sides of the lattice touching the sides of the sphere.
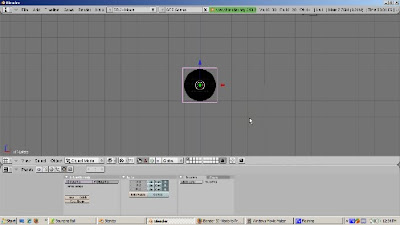
To make the lattice control the sphere, select the sphere, then Shift Select the lattice. Press Control-P and choose the Lattice Deform option to make the lattice the parent of the sphere. Select the UV Sphere and press F9. Look at the modifier stack. You should see the phrase "Lattice parent deform" at the top of the stack. This means that the lattice modifier was applied correctly. To test this, select the lattice and scale or move it. The sphere mesh should scale or move as well. We'll use the lattice later to squash the ball. The Make Real button would make the lattice permanently control the ball. We can ignore this button for this simple tutorial.
Now it's time to animate the ball. To do this, switch to Scene SR:1-Animation. This built in scene setup has all the windows we need for animation - the Outline Window, the 3D viewport of course, the IPO window, which we'll use later, and the buttons window.
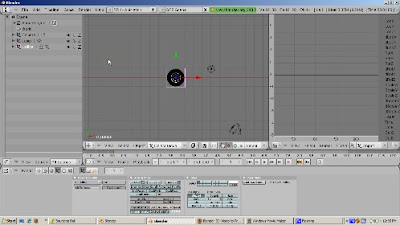
Position the 3D cursor in the 3D viewport and press Num1 to go to Front View. The blue Z arrow should point upwards. We're going to animate the first bounce over 23 frames, which is about 1 second assuming a standard movie speed of 24 frames per second. Press F10 to go to the Scene buttons, and set the end frame to 23.
It's time to insert key frames. Note that we are animating the lattice, not the ball.
Make sure we're in Frame 1. If not, press Shift-Left Arrow or enter the number 1 in the Frame Number area. We start the animation when the ball is at the top of its bounce. Press the G key, then the Z key, to move the lattice up in the Z direction, about 7 blender units or so, to the top of the bounce.
Press the I key and set a key for LocRotScale. Note how there are now 9 curves in the IPO window, for location, rotation, and scale, in the X, Y, and Z direction. You get 3 curves for each, for X, Y, and Z.
Go to Frame 11. Press the G key, then the Z key. Mgzove the lattice down in the Z direction, to 1 Blender unit above the ground. This is where the ball will be squashed a bit. Press the I key and insert a LocRotScale key.
Go to Frame 13. Leave the Lattice in the same position and insert another LocRotScale key.
Go to Frame 23. Move the Lattice back to its position at Frame 1 by pressing the G key, then the Z key, then moving it back to 7 Blender Units up. In real life, the ball should move back somewhat less than that, because of friction, but for this tutorial, where the ball will just bounce forever, we can ignore this. Press I and insert a LocRotScale key.
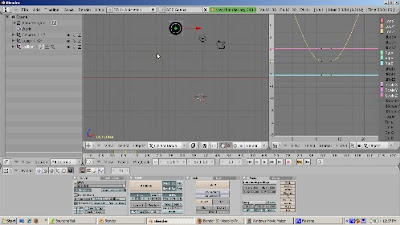
We have animated the basic bounce. On Frame 12, we will squash the ball. Go to Frame 12. Place the cursor at the base of the lattice. Set the Pivot point to 3d Cursor. Scale the ball on the Z axis by pressing the S key and then the Z key. Press I to insert a LocRotScale key.
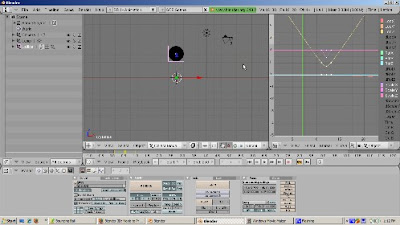
In IPO window, move the Green vertical bar back and forth to scrub the animation. We have now animated both the bounce and the squash. Pressing Alt A will also do the animation of the bounce forever. Press Esc to stop the animation.
The reason the ball bounces forever is that the animation is 23 frames long, exactly as long as the ball bounce. That's a coincidence. To demonstrate this, change the animation length to 250 frames. and press Alt A. Now the ball bounces and just stays there from frame 24 to 250 instead of bouncing. Suppose we want the ball to bounce forever no matter how long the animation. To do that, go to the IPO window. Press A to select all the curves. From the Curve Menu, select Extend Mode and select Cyclic. When you replay the animation, Alt A, the ball bounces for the entire animation.
There's plenty more tweaking that can be done to this basic animation. You can add materials and textures to the ball. You can play with the IPO curves to control how the ball moves, stretches, and contracts. I hope this gets you started. Happy blending.
At first glance, one might think that animating a bouncing ball would be easy, a simple matter of moving a sphere and adding location keyframes. Sure, the ball would move. However, it would not bounce realistically. Because of gravity, the ball moves slower at the top than at the bottom. The ball actually is stretched a bit in the middle of the bounce and squashes when it hits the floor. Because of friction, the height of the next bounce is less than the height of the previous bounce. The spin of the ball must be realistic as well.
We're not going to address all these things. The purpose of this tutorial, which is based on the Blender 3D Noob To Pro bouncing ball tutorial, is to show the basics of animating a bouncing ball, including squashing the ball using lattice deformation and how to use IPO curves to bounce the ball a number of times without redoing the first bounce sequence again and again. I used Blender 2.49B.
We'll start by deleting the default cube (Right click, pressing the X key, and confirming the delete). Then add a UV Sphere (Space-Add-Mesh-UVSphere), accepting the default settings of 32 rings and 32 segments. From the editing buttons (F9), press Set Smooth. Then add a subsurf modifier at level 2. This gives us a nice round ball.

Press Num1 to go into Front View. Add a Lattice (Space-Add-Lattice). Press Z to go into wireframe mode. Select the lattice. Scale the lattice so that the UV Sphere is inside of it, with the sides of the lattice touching the sides of the sphere.

To make the lattice control the sphere, select the sphere, then Shift Select the lattice. Press Control-P and choose the Lattice Deform option to make the lattice the parent of the sphere. Select the UV Sphere and press F9. Look at the modifier stack. You should see the phrase "Lattice parent deform" at the top of the stack. This means that the lattice modifier was applied correctly. To test this, select the lattice and scale or move it. The sphere mesh should scale or move as well. We'll use the lattice later to squash the ball. The Make Real button would make the lattice permanently control the ball. We can ignore this button for this simple tutorial.
Now it's time to animate the ball. To do this, switch to Scene SR:1-Animation. This built in scene setup has all the windows we need for animation - the Outline Window, the 3D viewport of course, the IPO window, which we'll use later, and the buttons window.

Position the 3D cursor in the 3D viewport and press Num1 to go to Front View. The blue Z arrow should point upwards. We're going to animate the first bounce over 23 frames, which is about 1 second assuming a standard movie speed of 24 frames per second. Press F10 to go to the Scene buttons, and set the end frame to 23.
It's time to insert key frames. Note that we are animating the lattice, not the ball.
Make sure we're in Frame 1. If not, press Shift-Left Arrow or enter the number 1 in the Frame Number area. We start the animation when the ball is at the top of its bounce. Press the G key, then the Z key, to move the lattice up in the Z direction, about 7 blender units or so, to the top of the bounce.
Press the I key and set a key for LocRotScale. Note how there are now 9 curves in the IPO window, for location, rotation, and scale, in the X, Y, and Z direction. You get 3 curves for each, for X, Y, and Z.
Go to Frame 11. Press the G key, then the Z key. Mgzove the lattice down in the Z direction, to 1 Blender unit above the ground. This is where the ball will be squashed a bit. Press the I key and insert a LocRotScale key.
Go to Frame 13. Leave the Lattice in the same position and insert another LocRotScale key.
Go to Frame 23. Move the Lattice back to its position at Frame 1 by pressing the G key, then the Z key, then moving it back to 7 Blender Units up. In real life, the ball should move back somewhat less than that, because of friction, but for this tutorial, where the ball will just bounce forever, we can ignore this. Press I and insert a LocRotScale key.

We have animated the basic bounce. On Frame 12, we will squash the ball. Go to Frame 12. Place the cursor at the base of the lattice. Set the Pivot point to 3d Cursor. Scale the ball on the Z axis by pressing the S key and then the Z key. Press I to insert a LocRotScale key.

In IPO window, move the Green vertical bar back and forth to scrub the animation. We have now animated both the bounce and the squash. Pressing Alt A will also do the animation of the bounce forever. Press Esc to stop the animation.
The reason the ball bounces forever is that the animation is 23 frames long, exactly as long as the ball bounce. That's a coincidence. To demonstrate this, change the animation length to 250 frames. and press Alt A. Now the ball bounces and just stays there from frame 24 to 250 instead of bouncing. Suppose we want the ball to bounce forever no matter how long the animation. To do that, go to the IPO window. Press A to select all the curves. From the Curve Menu, select Extend Mode and select Cyclic. When you replay the animation, Alt A, the ball bounces for the entire animation.
There's plenty more tweaking that can be done to this basic animation. You can add materials and textures to the ball. You can play with the IPO curves to control how the ball moves, stretches, and contracts. I hope this gets you started. Happy blending.
Thursday, October 15, 2009
2.49 UV Unwrapping
Hi. The purpose of this tutorial is to show how to unwrap a globe into two hemispheres. This tutorial is based on the UV Map Basics Tutorial, in the Blender 3D: Noob To Pro wikibook. The URL is in the Youtube notes, as well as at blender3dvideos.blogspot.com, the Web site for my tutorials.
Why do we need this tutorial? The reason: UV Mapping was introduced way back in Blender 2.34 and has been extensively rewritten since then. The user interface, and many terms, have changed over time. As examples, UV Face Select mode disappeared in Blender 2.46, and the term LSCM (Least Squares Conformal Mapping) was used up until then. Now LSCM is simply called Unwrap. Many unwrapping tutorials were based on earlier versions. If you try to follow along in the current version, 2.49b, you can get confused. Hopefully, this video will help to show the steps to successful UV Unwrapping in the version most of us use.
So let's get started. Here's the default scene in Blender 2.49b. Delete the default cube (right click, then press X and confirm the delete). Add an icosphere (Space-Add-Mesh-Icosphere), accepting the default of 2 subdivisions. Scale it 3 times (S 3) to make a large globe. Let's smooth the globe out. From the Editing buttons (F9), press Set Smooth. Then add a subsurf modifier at level 2.
Split the 3d viewport horizontally, by clicking on the border, right click, select Split, positioning the vertical line to where the split should be, and pressing Enter. Make the left window a UV /Image Editor window.
Click on the border of the User Preferences window and drag down to show the user preferences. Click View Name so we can see the view name (Top Ortho). Then click on the border and drag up to free up the area for the 3D view.
Tab into edit mode, and press the A key to deselect all vertices. We're going to make a seam for the UV editor to split the sphere in two parts. To do that, press Num3 to go into side view (right ortho). We're going to box select the vertices at the equator so that when the sphere is unwrapped, the UV unwrap program will know how to split the sphere. So box select (Bkey) the vertices at the equator and press Enter. Press Ctrl-E, which brings up the Edge Specials menu, and select Mark Seam.
Press the A key to deselect the seam and the A key again to select all vertices. Press the U key, which brings up the UV Calculation menu. Select Unwrap. This is actually LSCM Unwrap masquerading under a simpler name. There are many other ways to UV unwrap an object, as you can see. The sphere is unwrapped in the UV/Image Editor window.
The easiest way to actually place the image onto the sphere is to export the unwrapping map to an image editor, such as Photoshop or the Gimp. I use the Gimp, but Photoshop will work just as well. To do this, from the UVs menu item, select Scripts, and choose Save UV Face Layout. Accept the default of 512 x 512 pixel map, which is perfect both for non Game and Game use in Blender, and save the file (it's a Targa image file) in your project directory.
Now open up the Gimp. Here are the steps I found that seemed to work well. First, open up the saved file we just created. Then open up the image to apply to the sphere. You can download the globe hemisphere image, BlueMarble 2001-2002.jpg from the UV tutorial wiki page. Go to the targa file first and find the diameter of the spheres that we need to fit the image to. The diameter is 270 pixels.
Switch to the BlueMarble jpg, the one containing the two globes. Choose the Ellipse Select tool and turn on the Fixed Aspect Ratio check box to make sure that we will do a circle select. Select the left globe. Copy (Control-C) the globe to the clipboard. Switch to the reference file. From the Edit Menu, select Paste As, and choose New Layer. Press Enter to confirm. Click on the Move tool (the one with the cross hairs) and move the globe to the center of the top series of triangles.
From the Layer menu, select Scale. Enter 272. I like to go a pixel a two more than the actual diameter to make sure we don't get any background artifacts included. Press Scale and position the expanded globe over the layout if necessary.
Now go back to the bluemarble jpg and choose the Circle Select tool. First Select None, to deselect the left globe. This time, circle select the right globe. Copy (Control-C) the globe to the clipboard. Switch to the reference file. From the Edit Menu, select Paste As, and choose New Layer. Choose the Move tool and move the globe to the center of the bottom set of triangles. From the Layer Menu, choose Scale, and scale the globe to 272 pixels as well.
Press Control-L to bring up the Layers menu. There are 3 layers, the original reference image and the two globe layers. Deselect the original reference image by clicking on the eye. Close the Layers menu. We now can save our file - we'll make it a jpeg - which will be just the two hemispheres. We'll call it FinalGlobe.jpg. Accept the Flatten Image dialog because that's what we want. Click on Export and accept the defaults.
Now go back to Blender. From the Image menu, open the FinalGlobe jpg. You might need to make some last minute tweaks to eliminate some dark background artifacts. Press the Shading buttons (F5). Add a new material. Click the TexFace button to tell the renderer to use the Unwrapped UVs. Press F12 to render. From here, you might need to add a lamp. If you go into Texture mode you can see the image on the sphere.
That's it. I hope this gives you the basics of UV unwrapping a globe image and gives you some ideas for its use. If you want to create games and need images, this is essential because Blender's game engine requires UV textured images. Happy blending.
Saturday, October 10, 2009
Blender Community Toolbar
Hi. I'm Ira Krakow. The purpose of this video is to make you aware of a fantastic resource which I think is an essential tool for any Blender user, from newbie to seasoned professional. It's called the Blender Community Toolbar.
The Toolbar installs in seconds on your browser. There are versions for Internet Explorer, Firefox (the one I use because I like open source), and Safari (the Apple Macintosh browser). I also want to point out some of the links that I have found useful. This is just one person's favorites list, and certainly it's not an exhaustive one. Blender has a large and enthusiastic worldwide following of extremely talented people who volunteer their time and knowledge to enrich the experience of working in Blender for all of us.
So let's start with Kernon Dillon, the author of the Blender Community Toolbar and developer of Blendernewbies.com. First, I want to publicly thank Kernon for all the hard work he's put into blendernewbies. Kernon's clear, precise, and even tempered presentations of even the most difficult Blender topics are a pleasure to watch. Two of my all time favorites are:
A five part tutorial on modeling oven baked pretzels in Blender, which describes just about everything about how to make the pretzels in such a way that you can smell the pretzels baking in the oven.
A three part tutorial on making a magic wand with Blender particles.
I'm not alone as a member of Kernon's fan club. You can read Kernon Dillon, A Blender Community Treasure.
Now we'll do a quick tour of the toolbar. At the extreme left is a button with the Blender icon. Click on that and you'll get to the official Blender Web site, blender.org. This is the place to check out the official Blender news, straight from the source. You can download the latest version (2.49b), learn about Elephant's Dream, Big Buck Bunny, and YoFrankie, the Blender open source movie projects, as well as Durian, the latest Blender open source movie, coming soon to your local computer. You can also access Blender's documentation, the wiki, and catch up on the news from BlenderNation.com, another great place to find out what's going on in the world of Blender.
If you're new to Blender, check out the Blender Basics Video Tutorial link, which gets you to BlenderUnderground.com's excellent 5 Part Blender Basics video tutorial. Blenderunderground.com, lead by Apollos, goes beyond the basics, looking inside the hood to show us how Blender actually operates. The philosophy is that to be efficient in Blender you need to know how Blender works, not just mindlessly pressing keystrokes to get a particular effect. My favorites are:
Part 4, especially the discussion of the outliner. After viewing this, you'll know why you need to create a material before you create a texture, or the difference between an object and its data.
and
Part 5, which has an in depth discussion of lighting, shaders, ray tracing, and other good stuff.
The next button has links to tutorials, from the beginner to the advanced level. One I found very useful is the Introduction to Character Animation. This was part of the Blender Summer of Documentation project. If you can master this tutorial, you will be well on your way to understanding how to animate a character in Blender.
The Extras tab contains many links to Blender resources that should give you many ideas. One link I like is the Blender Open Material Repository. It's a database of over 600 materials, ready for use in your Blender projects.
If you want to extend Blender with Python scripts, you can check out How To Use Python Scripts in Blender, as well as the many Python scripts available for download from the toolbar.
The most fun area of the Community Toolbar is the RSS feeds. You can catch up on news from all sorts of sources. As you can see I have over 400 unread articles. Staying up to date with Blender takes just about a 24 hour, 7 days a week, 365 days a year proposition.
I certainly would follow the articles in Blenderartists.org closely. Blenderartists.org is the most popular site for Blender users, as opposed to Blender.org, which is more geared to Blender developers. The toolbar also includes the feed for Blendernation, just another way to keep up with developments. If you want to see how Blender 2.5 is progressing, follow the Blender Development and the Blender Development Log feeds. And to download the latest version of 2.5, follow the graphicall.org feed. What's nice is that the RSS feeds are updated as soon as new content is added, so you'll always be up to date.
Obviously a short video like this cannot get to all the fantastic resources available from the Blender Community Toolbar. I hope I have encouraged you to download it and see for yourself. Happy Blending!
Subscribe to:
Posts (Atom)