This blog contains the scripts for my Blender 3D YouTube videos. They're published as follows:
Buy The Blender 3D Cookbook as a book!
Buy the Blender 3D Cookbook for your iPad!
Buy the Blender 3D Cookbook for your Kindle!
Wednesday, September 30, 2009
2.5 Camera Controls
The purpose of this video is to demonstrate the camera controls in Blender 2.5. The controls are similar to Blender 2.4x. 2.5, at least my pre-alpha release as of mid-September, adds some interesting controls, notably the Panorama lens, simulating a 360 degree fisheye lens. You could follow along with a 2.4x Blender version, although you would need to either create your own version of Quad View or just follow me with your own 3D view.
The camera settings are grouped in the Object Data icon for the camera object. In 2.4x, highlight the camera (right click), and press F9 for the Edit buttons. Since the controls are very similar, if you know your way around the Blender 2.4x camera, you should be able to become comfortable with Blender 2.5's camera very quickly. I don't think you can buy a camera with all of Blender's features. You can get some interesting effects by adjusting its controls, which might be easier than moving the camera.
We'll start with the 2.5 default scene, and highlight the camera. This demo works best in the new Quad View. From the View Menu, select Toggle Quad View to see the scene from Top, Front, Right, and Camera views simultaneously.
Look at the Camera View, in the upper right corner of the 3D viewport. The camera is in Perspective mode and the cube is in the center. Press F12 to render.
The camera controls are located in the Object Data area of the Properties Window (formerly known as the Buttons Window). By default, Blender renders the camera in perspective view, where parallel lines meet at a vanishing point. The lens angle defaults to 35 millimeters, a standard camera lens. Increasing the angle causes the camera to zoom into the cube. Decreasing the angle causes the camera to zoom out. You can choose degrees instead of millimeters, if you wish. Here's the scene rendered from a 100 degree camera lens.
Press the Orthographic button. The camera now is in Orthographic view, where parallel lines do not meet. Below the Perspective / Orthographic buttons is the Orthographic Scale area, set to 7.314. If you lower the scale setting, it's as if the camera zooms into the cube. If you raise the scale setting, it's as if the camera zooms out and the cube is farther away from the camera. This is a way of changing the camera's view without actually moving the camera.
Check the Panorama check box and press F12 to render. The result is a cube as if it was shot with a 360 degree panoramic fisheye type lens.
Turn off the Panorama check box and switch back to Perspective view.
Go to the Display area and check the Limits button. Limits gives each view a line showing how far, in blender units, the camera sees. You can control what the camera sees by changing the Clipping Start and Clipping End parameters. Clipping Start, defaulting to .1, is the number of blender units where the camera starts to see. Clippiing End, defaulting to 100, is the number of blender units up to where the camera sees. Change Clipping End to 5 and press F12 to render. The cube does not render because the camera's view is clipped before it sees the cube. You can see that the camera's clipping end is before it sees the cube. Increase Clipping End until the camera can see part of the cube, at 10 blender units or so. Then press F12 to render. Incidentally, the camera view shows how much, if any, of the cube, will render. Now the a part of the cube is rendered. Press Z to go to wireframe mode, so we can see the inside of the cube. Increase the camera's Clipping End to 11 and press F12 to render. We see even more of the cube. Finally, with clipping end at 12, the camera can see the entire cube.
The Passepartout checkbox, which is on by default, is a visual way of showing what part of the scene the camera sees. In 2.4x, Passsepartout is off by default. Uncheck the Passepartout checkbox. The entire camera area is shaded uniformly, so you would not know what the camera see unless you render the scene.
Check the Passpepartout check box. The alpha slider underneath Passepartout controls the transparency (alpha of 0, means fully transparent, alpha of 1 means fully opaque) of the passepartout area - how much of the scene under it is shown.
Check the Title Safe button, which is off in 2.5 but on in 2.4x. Title Safe is a dashed line which shows the limits of the area that would display on certain television screens. Don't worry about it unless you are planning to distribute your video to television. Even here, Title Safe only applies to certain types of televisions. Uncheck the Title Safe button to show what will render. Move the cube to the upper left corner of the Passepartout area and press F12 to render. The cube actually renders in that area.
Highlight the camera and go back to the camera controls settings.
The Shift X and Shift Y settings allow you to adjust the camera viewing area without moving the camera, similar to you adjusting a real camera.
Check the Name button. This shows the camera name - Camera - in the 3D viewport.
Size is size of the icon, defaulting to .5 blender units used for the camera icon. It has no effect on the rendering. You may want a bigger or smaller camera icon in your scene. Note the filled in triangle at the top of the camera. The fact that the triangle is filled in means that this camera is the active camera, the one that will be used when the scene is rendered.
Although you can have as many cameras as you like, only one active camera is allowed in Blender. To illustrate, select the camera and press Shift-D to duplicate. Then move the new camera to another part of the scene. The new camera has a hollow triangle instead of a filled in triangle, which means that it is not the active camera. In Blender 2.4x, you could make the new camera the active camera by pressing Control-Alt-Num0. My pre-alpha version of Blender does not have this functionality yet. You need at least one camera to render a scene. In Blender 2.4x you would get the "Error-No Camera" message if you did not have a camera and pressed F12. In Blender 2.5, no error message is produced, but you don't get a render either.
The Mist check box shows the mist area for the camera, if Mist is on. To illustrate, I'll move the cube back towards the center of the scene. Then, we go to the World buttons, turn on the Mist check box there to enable mist. Set the start of the effect at 1 and the end at 11. Press F12 to render. Part of the cube is shown, the other part is shrouded in mist.
Depth of field can be set for an object, or in blender units. It determines where the focus of the camera is. Depth of Field can be set in blender units, or you can specify an object on which the camera will focus. We'll set Depth of Field to the Cube object. DOF won't affect the render unless we use nodes, with the Defocus Filter or a blurring type of filter. We'll save that discussion for another time.
That's it. The Blender 2.5 camera can produce interesting effects to make your scenes more realistic.
Thursday, September 24, 2009
2.5 Array Modifier
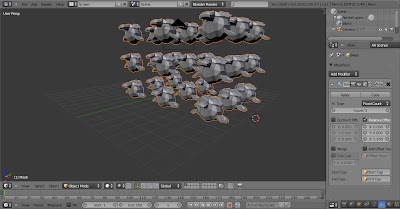
The purpose of this video is both to make you comfortable with the user interface of Blender 2.5 and to show how Blender's array modifier works. The array modifier is a handy way of creating a lot of objects quickly. It's much more efficient than duplicating each object with Shift-D and then positioning it. Our goal is to create a "cube array" of 27 monkeys, 3 in the X direction, 3 in the Y direction, and 3 in the Z direction. You could easily create an army of hundreds, or even thousands, of objects, in a few keystrokes. If you're creating a game with thousands of aliens, the array modifier will save you many hours duplicating all those characters.
Even though I created this video with a mid-September pre alpha build of Blender 2.5, which means that everything is subject to change before the final version of Blender 2.5 is released, the array modifier works the same way as in Blender 2.4x versions. So let's get started.
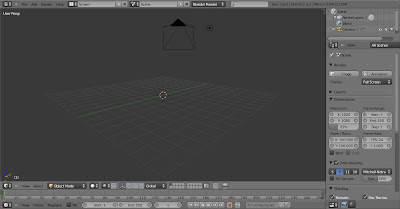
Start up Blender 2.5, with its default scene. Delete the default cube, which is selected by default. If it's not, right click to select. Use the X key (the delete key doesn't work) and confirm the delete.
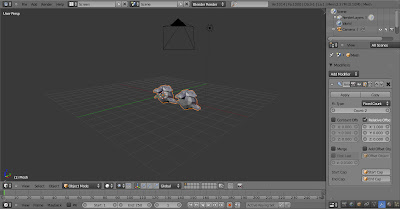
We'll start with one monkey. Add the monkey to the scene by pressing Shift-A (the space bar gives you a different menu), then Add-Mesh-Monkey. Click on the Modifier panel, an icon that looks like a wrench, and click on Add Modifier. Click on Array. You will see two monkeys. The default is a fixed count array, where you specify the number of objects in the array, set to 2 objects, with a relative offset X of 1 Blender Unit, with Y and Z offsets of 0. The numbers you see in the relative offset and the constant offset X, Y, and Z areas are in Blender Units. You can use either Relative Offset, Constant Offset, or both, to position the array objects.
Constant Offset tells Blender to position the duplicate copy the number of Blender Units in the X, Y, or Z direction, from the center of the previous object. Relative Offset uses the actual width of the object, in the X, Y, or Z direction. In the perspective view, you can see how you can control the positioning of the monkeys in the up and down, left and right, or side to side, using either Relative Offset, Constant Offset, or both.
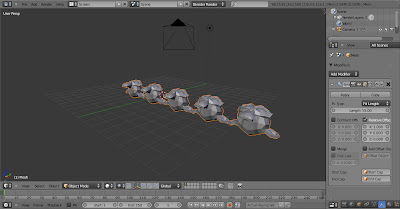
Instead of Fixed Count, you can use Fit Length. When you choose Fit Length, the Array Modifier will add as many monkeys as will fit in the number of Blender Units specified. The offset settings, constant or relative, need to be taken into account to determine how many monkeys fit. If you increase the spacing between the monkeys, you will reduce the number of monkeys in the array.
Another option is Fit Curve. You control the number of copies by creating a curve and increasing or decreasing its length. Any one of Blender's curve objects - Bezier curve, Bezier circle, NURBS curve, NURBS circle, or Path - will work. Mesh objects will not work. We'll create a Bezier curve as an example. You need to tell the Array Modifier the name of the curve. The default name is Curve, which we enter in the Object box. The name is case sensitive. As soon as we do that, the curve will control the number of monkeys generated. This is a great way to animate duplicate copies because the curve can be animated.
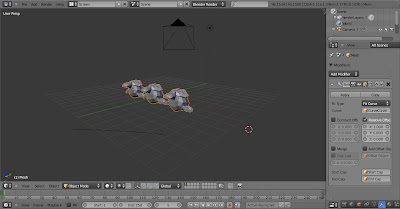
Delete the curve, by right clicking on it, pressing X, and confirming the delete.
Go back to Fixed Count. We'll now create our 27 monkeys arrayed in a cube fashion. Start off by creating 3 monkeys in the X direction, with the X offset of 1.5, to give us some space between the monkeys. Press Apply, which makes the change to the object permanent. We now have cloned 3 monkeys in the X direction.
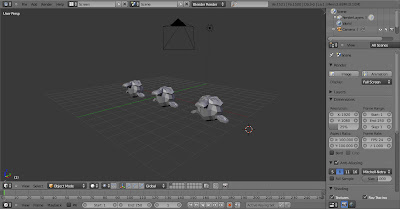
Next we clone the 3 monkeys 3 times in the Y direction. Click on Add Modifier and select Array. This time, the X offset will be 0, and the Y offset will be 1.5, which gives space in the Y direction. Press Apply. Now we have 9 monkeys in a 3 x 3 grid.
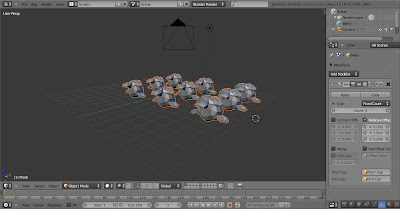
Finally, we clone the nine monkeys 3 times in the Z direction. Click on Add Modifier. Select Array. Set the X offset to 0, the Y offset to 0, and the Z offset to 1.5. The result is 27 monkeys in a cube style arrangement.
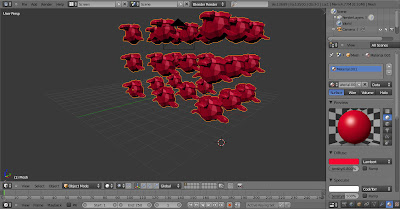
The monkey array is actually one object. To illustrate that, let's make them all red. Click the Material button and set the diffuse color to Red by using the slider.
I'll switch to Quad View to illustrate how we can see the front, side, top, and camera views of our monkey cube, all at once.
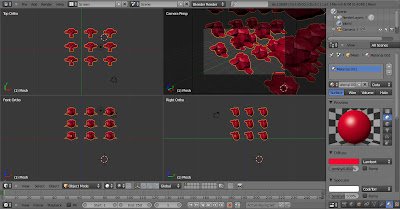
The array modifier is a flexible and quick way to clone objects in Blender. Thanks for watching.
Tuesday, September 22, 2009
2.5 Ambient Occlusion
I have two goals for this video. The first goal is to familiarize you with the rendering settings of Blender 2.5. The second is to explain ambient occlusion, a powerful tool for rendering 3D objects more realistically. Even though I did this tutorial in 2.5, it should work in your version of Blender as well. Please note that this is based on a pre-alpha Windows version, as of September 15, 2009. As such, everything is subject to change. However, most probably, the basic user interface will not change that much. In addition, the renders can also change between this version and when Blender 2.5 officially is released, both because of implementation changes and tweaks to the algorithm.
We start with the default Blender 2.5 scene. The 3D window contains a camera, a lamp, and a cube, in perspective mode. Let's render the default scene. The scene icon, a camera, is where the settings for rendering the scene are set. The default dimensions are 1920 x 1080 pixels at 25% of full size, which gives a higher resolution image, with a lower size, than the old default of 800 x 600 pixels at 100%. The default output is Portable Network Graphics (.png), as opposed to JPEG. Here's the default Blender 2.5 scene.
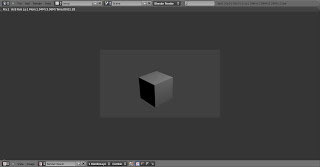
Note that the World colors have also changed, which explains the change in the cube's background.. The horizon colors are Red=.250, Green=.250 and Blue=.250. The old horizon colors were Red=.05, Blue=.22, Green=.40. The zenith colors are Red=.1, Green=.1, and Blue .1, and the ambient color is black (Red=0, Green=0, and Blue=0).
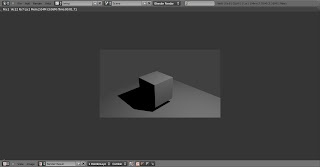
Let's add a plane to our scene, to show ambient occlusion. Remember to use Shift-A instead of the space bar to bring up the Add Object menu. Do Shift-A, Add Mesh, Plane. Position the plane below the cube by grabbing it (GKey) and relocating it below the cube. Then scale it 5 times with Right Click, followed by S, followed by 5, and pressing Enter. Now the cube lies above the plane. Press F12 to render. You should see the cube casting a shadow on the plane, as shown below.
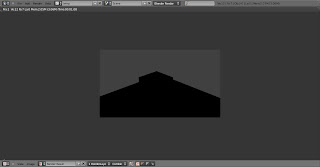
Now let's delete the lamp. Highlight the lamp (Right Click), press X (you can't use the delete key), and confirm the delete. Now when we render, all the objects are black. The world colors render where there are no objects. The render should display as shown below.
Ambient occlusion uses the ambient color, combined with a mathematical technique that darkens corners or areas hidden by other objects (the word "occlusion" is a fancy word for hidden). Lets go to the World buttons and find the Ambient Occlusion panel. Check the Ambient Occlusion check box, accept the defaults, and press F12 to render. In the older versions of Blender, press F8 for the material buttons, then the World subcontext, find the Amb Occ panel, and click on Ambient Occlusion. Here's the render I got.
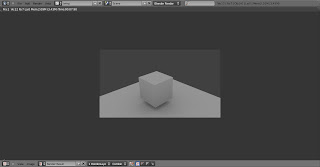
Blender uses the World colors to color the cube and the plane, and then rendered a small shadow on the plane. The shadow is larger as the cube moves closer to the plane. Move the cube closer to the plane, use the G key and move in the negative X direction. Then press F12 to render.
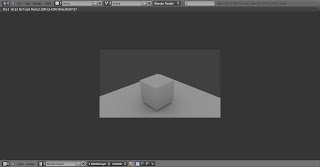
This render took about 7 seconds. If you raise the number of samples up to 10, the shadows become crisper, but the render time is much slower. This simple render took about 24 seconds - over 3 times slower.
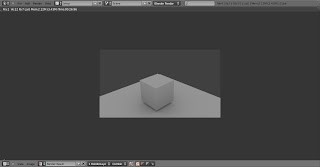
Set the samples back to 5.
By default, ambient occlusion uses ray tracing, casting rays from each pixel of each object. If the ray finds an object before reaching the World, the pixel is darkened. The resulting shadows are affected by the closeness of the object. Go to the World buttons. If you turn off all the Shading check boxes (they're all on by default), you won't get any ambient occlusion.
The two check boxes you need to check (buttons in earlier versions), are Shadows (to get any shadow effects at all), and Ray Tracing. Now if you render, with F12, you'll get AO (shorthand for Ambient Occlusion).
Approximate Ambient Occlusion is a way to get faster rendering with good AO effects, though not as good as ray traced AO. Turn off Ray Tracing (but keep Shadows on). Then go to the World buttons and click Approximate. Then render (F12). Here's the result on my computer.
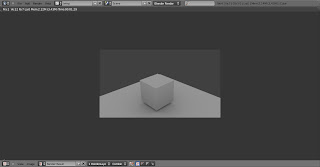
Not quite as precise an AO render, but the render time was less than 3 seconds. Approximate AO is a great choice for animation because of the tremendous savings in rendering time. Choose it while you're developing, and turn on ray tracing AO on the final render.
Add a UV Sphere and a monkey to to the scene, moving them close to the cube and slightly above the plane. Press F12 to render. You should see shadows cast by all three objects on each other.
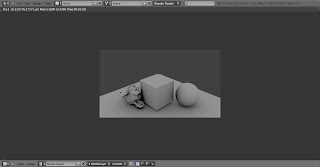
Here's an interesting effect. Change the horizon color to a nice blue shade. Change the color to Sky Color from the default of White. Press F12 to render.

The scene is now affected by the sky color. This only scratches the surface. You can play with the Falloff, Pixel Cache, Attenuation, and other settings, as well as combine AO with the lamps in your scene. I hope this gives you good ideas for making your scenes more realistic.
2.5 Pivot Points
Hi. The goal of this video is to get you comfortable moving around in Blender 2.5. If you're going to continue with Blender, 2.5 will be your new home. The developers just made 2.5 the official "trunk" for Blender development. That means that future development will be exclusively in 2.5. Work on older versions will, most likely, be limited to bug fixes and, as 2.5 becomes the standard.
Scaling and rotating objects are a fundamental Blender skill. The pivot point defines how objects will be rotated and scaled. If you're relatively new to Blender, you can easily get objects moving in ways you might not expect. As we progress, I will point out differences between Blender 2.5 and the older versions. The pivoting actions really haven't changed in 2.5. However, some cosmetic things like the default color of the active object and the icons for rotation and scaling, have changed. You should feel very comfortable pivoting your way in 2.5 almost immediately.
We start with the default Blender scene. First, we delete the default cube. Before, you could either use the delete key or press X. In 2.5, only X works. The delete key does nothing. So press X and confirm the delete.
We'll add the monkey object, by pressing the SPACE key. Something happens, but it's not what you expect. You get a different menu than before, a menu that has nothing to do with adding objects. Press ESC. We'll save discussion of that menu for another time. Instead, press Shift-A, which is the keyboard shortcut for adding objects. Shift-A brings up the familiar object add menu. Select Add-Mesh-Monkey, as before.
Let's look at the outliner window, in the upper right corner of the screen, and scroll down. Guess what? Suzanne isn't there. She has been renamed "Mesh". I guess they'll have to rename the Suzanne Award.
We'll create 3 monkey objects to demonstrate rotation. First, duplicate our monkey - it will take a bit of time getting used to the name "Mesh" - with Shift-D. Shift-D works as before. We grab the copy and move it away from the original, and left click to confirm. Then we press Shift-D to create another copy and drag it to form a triangle of monkeys.
Switch to Quad View, a new built in view, by going to the View menu, and selecting Toggle Quad View. The window is divided into 4 windows, Top, Front, Right, and Camera, that make it, in my opinion, much easier to navigate around your scene than before. Since Toggle Quad View is a toggle, by selecting Toggle Quad View again, you get back to the startup scene, with just one 3D window.
We'll work in Quad View. Adjust the monkeys positions so that they look right in Top View and Camera View. We'll work in Top View. Select the first monkey with right click. Then hold down the Shift key, Right Click, and select the second monkey. Hold down the Shift key, Right click, and select the third monkey. Note that the default color for the selected object and the active object - the last one you selected, and the name that displays in the lower left hand corner - has changed from pink to orange. I think orange is much easier to see. The active object has a light orange border, as opposed the light pink in the older Blender versions.
The default pivot mode is Bounding Box center, which means that the pivot point is defined by the bounding box. The Move Object Centers Only is off by default, as before. Press the R key to rotate the monkeys. Note that the rotation icon is double arrows, and that the monkeys rotate around the bounding box center. Pressing Escape cancels the rotation, as before.
Just for fun, press the R key twice (R and R). This allows you to rotate in 3 dimensions. It's a neat feature and not very well known. Press Esc to cancel.
Turn the Move Object Centers button on. This makes rotation and scaling affect the object center only, not the objects themselves. Now press the R key and rotate. The monkeys do not tilt as they rotate. Press Esc to cancel the rotation, and turn off the Move Object Centers Only button.
Now press S to scale. With the Move Object Centers Only button inactive, all the monkeys grow or shrink. Press Esc to cancel the scaling. Now turn on the Move Object Centers Only button and press the S key. Now, the monkeys don't grow or shrink, BUT they do get nearer or farther away from each other while preserving their relative position. This is useful for repositioning objects in your scene. Press Esc and turn off the Move Object Centers Only button.
Now open the Pivot Menu and select Active Object as your pivot point. Press R to rotate. Now the monkeys tilt while they rotate around the active object, similar to the bounding box behavior. Press Escape to cancel.
Turn on the Move Object Centers Only button and press the R key. Now the monkeys keep facing forward as they rotate around the active object. Press Esc to cancel the rotation, and turn off Move Object Centers Only.
Press the S key to scale. The monkeys grow and shrink. Press ESC to cancel the scaling. Turn on the Move Object Centers Only button and press the S key. Now the monkeys move away from or closer to each other but do not grow or shrink. Press ESC to cancel. Turn off the Move Object Centers Only button.
Open up the Pivot Menu and select Individual Centers as your pivot point. Press R to rotate. Each monkey rotates around its center point. Press Esc and turn on the Move Object Centers button. Now when you press R to rotate, nothing happens. That's because only the centers (all 3 of them) rotate. The monkeys don't do anything. Press Esc to cancel.
Turn off the Move Object Centers button and press S to scale. Now the monkeys grow and shrink in unison, like a dance line. Press Esc to cancel and turn on the Move Object Centers button. Again, the monkeys don't do anything because only the centers scale, and each of them is only a point to begin with. Press Esc to cancel and turn off the Move Object Centers button.
Open up the Pivot Menu and select 3D Cursor as your pivot point. The behavior of rotation and scaling is the same as for Bounding Box and Active Object, except that the pivot is around wherever the 3D cursor is situated.
Our final pivot point type, Median Point, is the center point for all the selected objects. This is similar to Bounding Box center, except that the median point might be, and usually is, different from the bounding box center because objects tend to have different sizes. As you see, the behavior is similar, but the pivot point is slightly different.
To summarize, pivoting is basically the same as before. However, because of the new Quad View, the better choice of colors and icons, and the improved design of the startup screen, it's much easier to see what's going on.
Wednesday, September 16, 2009
2.5 User Preferences
I ran the pre-alpha version of Blender 2.5, as of September 15, 2009. You see the startup screen first, then I switch to the User Preferences window. After that, I hover over each menu item long enough for the tooltip to display. If there is a menu choice, I click to display all the choices. Remember, this is pre-alpha software. No guarantees that each and every feature will make it into the final 2.5 release, but this should give you an idea about what the developers goals are. I apologize if you're not a speed reader. You might want to pause the video often, read the tooltips you're interested in, and continue.
Tuesday, September 15, 2009
2.5 Sneak Preview
I played around with a recent build (878-361, to be exact) of Blender 2.5. Blender 2.5 is a major rewrite of Blender which, in my opinion, makes Blender's great user interface and experience even greater. I'd like to give you a quick tour of the startup windows and the menus, to give you a sneak peek at Blender's makeover. Blender's new look is very exciting.
Please remember that we're looking at 2.5 in its embryonic stage. It's not even in its pre-release stage. Not all the features we see may make it into the final release. However, there's enough to explore so that we can get a general idea of what 2.5 will ultimately look like. I'm not going to try to build anything, or see whether any of the menu choices work. I just want to give you a quick peek of 2.5, under the hood.
So let's get started.
Here's the Blender 2.5 startup screen. Right off the bat, you'll notice a few changes. First, the Buttons Window is gone, replaced by the Timeline. Second, the 3D Viewport, defaults to a User Perspective view, as opposed to Top View in earlier versions. In the 2.5 view, you actually can see the cube as a cube, aligned along the grid.
Some things are the same. We still have the same 3 default object, the camera, the lamp, and the default cube. You can verify that because a small outline view window is in the upper right corner of the screen. Scrolling down will show you that the three objects are indeed in the scene.
Look at the User Preferences menu, which has changed somewhat. Gone are the Timeline and the Game menus. We have 4 menu items, File, Add, Render, and Help. So is the dropdown with the 5 default screen styles. This is replaced by a menu with the default Screen, called, appropriately, Screen. You can create your custom screens by pressing the + key, which adds a screen named Screen.001. You can delete the Screen by pressing the X key right next to it.
The default scene is called Scene, as in 2.4x Blender versions. You can click on the + button to add a scene - a change from selecting Add New.
A new menu lets you select among different rendering engines. The default, as it was before, is Blender's internal renderer. You now can select Blender Game, Povray, or install another renderer, which should (I'm only speculating) make the Engine menu item selectable.
A new "jobs timer" has been added.
The information about vertices, faces, objects, layers, memory, and so on, has not changed.
I mentioned the small outliner window earlier. You can use the scroll bar or press Ctrl - down arrow (as before) to toggle this window (or any window, for that matter) .
The panel at the lower right contains a number of menus. These menus change depending on the context you're in. The default is the scene panel, which has the buttons you need that are relevant to rendering the current scene.
These used to be part of the World buttons. If you click on the All Scenes dropdown, these buttons can apply to other collections of scenes and other data.
The menus are collapsable. Press the arrow to expand or contract. You can get full expansion or full contraction. Fully collapsed into groups, the scene groups are: Render, Layers, Dimensions, Anti Aliasing, Shading, Output, Performance, Post Processing, Stamp, and Units. The groupings have changed from the old World settngs. Look at Output, for example.
At the bottom is a group of icons that let you toggle among different button settings. The default is the camera icon, for the scene. Next is World, which has the menu choices that are more global - Preview, World, Ambient Occlusion, Mist, and Stars.
The Object buttons are Transform, Relations, Groups, Display, Duplication, and Animation. Note that the default name of the cube, which is selected by default, is NameCube - no doubt, to encourage you to actually name your objects - a good habit to get into. These buttons control aspects of the selected object. Look at Transform, which controls location, rotation, and scale. Note that X, Y, and Z are assumed, so LocX, LocY and LocZ labels are gone.
Next are Constraints. From the dropdown, you can add the constraints shown.
Next are the Object Data buttons, grouped into Normals, Vertex Groups, Shape Keys, UV Texture, and Vertex Colors.
Next are the Modifiers. The modifiers are grouped into an easy to read 3 column list.
Next to last are the Material buttons, with the groups you see.
Finally, there are the Texture buttons.
Each window has, at its lower left corner, a menu from where you can change its type. We'll go to the Timeline window, which currently has its menu bar displayed, and click on its window type icon. A few changes, right off the top: the Scripts Window has been renamed Console, User Preferences has been renamed Info, and the Action Editor has been renamed Dopesheet. I'm sure there are other changes.
I hope you enjoyed our sneak preview of Blender 2.5. It looks like the best is only going to get better. So happy Blending and see you next time.
Sunday, September 13, 2009
Falling Domino Physics
This tutorial is based on Super3Boy's 19th Blender Tutorial. The link to his tutorial is in the description, and you can go to forum.nystic.com as well. His tutorials are great. He's enthusiastic and he's easy to follow. The problem is that he used an earlier version of Blender. The current version, 2.49, has a different user interface, and so some of his tutorials can get confusing if you're following along in the newer version. So I'm updating those that have been affected by the changes.
If you are thinking about making a game in Blender, you will probably want to learn about Blender's physics engine as well as the game engine. Blender's physics makes the objects move more realistically. This tutorial touches both on the physics and the game engine, as well as showing you how to create a video of it.
So let's get started. Start up Blender with its default scene.
1) X erase the default cube. If object not selected navigate to it and right click to select.
2) Space Add Mesh Plane
3) S 5.
4) Left click object mode tab.
5) Space add mesh cube
6) tab object mode - S x make thinner.
7) S y make thinner.
8) Front view.
9) Z key - wire frame mode to see the plane.
10) Select the block - G move over to edge, close to plane.
11) Actor - Dynamic - Rigid Body - Bound - Box.
12) Domino - P key - goes to game engine.
13) Esc gets out of that.
14) Rotate the block a bit with R. with P falls over.
15) Duplicate these. Shift D across the plane.
16) You can texture these later. P key - they all fall over.
17) Get out of wire frame - solid mode.
18) Shift - D , rotate 90 - put it on top - make a building thing.
19) Then P key, they all fall over.
20) Alt A doesn't animate.
20) Then Game, Record Game Physics to IPO.
21) Alt - A then you can animate it.
22) Then you can create a movie out of it.
23) Scene F10.
24) Preview preset.
25) Quicktime.
26) ANIM button.
27) Output folder.
27) Falling domino video.
Hope you liked it. You can do a lot more - texture to make real looking dominos, falling bricks with cubes stacked on top of each other. You can be real destructive without, of course, having to pick up the pieces. Enjoy!
Splitting and Joining Windows
Blender's default scene has 3 windows, the preferences window, the 3d window in the middle, and the buttons window at the bottom. It's possible to split and join windows, and to turn the window into a different type, so that you get different views.
Steps to demonstrate:
1) Start up Blender 2.49b, to get to the default scene.
2) Delete the default cube (right click on the cube to select, then either the delete key or X, then Enter).
3) Add Suzanne, Blender's monkey mascot (SPACE - Add - Mesh - Monkey).
Now we're going to split the 3D viewport window into 4 windows, to show the top, right side, front, and camera views, at the same time. First, we split the window horizontally, as follows:
4) Drag the cursor to the extreme left edge of the 3D viewport. The cursor changes to a double sided arrow. When you right click, you get a menu with a choice of No Header or Split Area. Click on Split area.
5) You will see a horizontal line. The line shows where the 3D window will be split if you left click. You can move the line to control exactly where you want the split to occur. When you are satisfied with the split, left click and the window will split horizontally into 2 windows.
We need 4 windows. We will split each window vertically start with the top 3D window, and drag the cursor to the window's bottom edge. The cursor will change to a double sided arrow, this time pointing vertically. When it does, right click, choose Split Area, and you will see a vertical line showing where the window will be split. The line will be in the window that will be split. When you are at the place where you want the window to split, left click to split the window.
Do the same procedure with the bottom window, until you get 4 windows.
Each window can be switched to a different type. Blender has many types of windows. If you click on the 3D icon, at the lower left side of the window, you can see all the types. Let's switch to the outline window, which shows all the objects in our scene in a table. As you get more comfortable with Blender, you will switch windows often. The outliner is a handy way to switch between different objects in the scene without having to navigate. It helps when the scene becomes complicated. Our scene has, in addition to Suzanne, a camera and a lamp. Click on the outliner icon and change our view back to 3D.
Right now, each window has the same view of Suzanne, the top view, looking at her from the top down. I just happen to know that. Blender can tell us what view we're in, and it's a good idea that you know as well. To display the view orientation, open up the User Preferences window (it has an I, for Information, label, in the upper left corner. Drag on the bottom of the window until you see a double arrow. Left click and drag down until the window opens up. Press the View Names button, on the left row. The button darkens, which is Blender's way of telling you that the feature is active. Then close the window by clicking on the lower left corner and dragging up.
Note that on each window, on the upper left corner, is the phrase "Top Ortho". This means that the window is in Top View, in what's called Orthographic mode. Orthographic mode means that distance is not taken into account and that the size of the object is not distorted by distance. Most of the time you will model in orthographic mode. We'll discover another mode soon.
Using the View Menu of the 3d window, you can change each view to a different perspective. By using the menu, change the first window to Top, the second window to Front, the third window to Right (the default side), and the fourth window to Camera. Now move the monkey, by right clicking on Suzanne to select it (a pink highlight displays), and then pressing the G key and then dragging the mouse. You can see the effect of moving the monkey in each window.
Look at the window that's in camera view. Note that the indicator in the top right corner of the window is "Camera Persp". Persp stands for Perspective view, which means that distance is taken into account. It's like a highway, where parallel lines meet at a long distance. In orthographic mode, the parallel lines will not meet.
There are shortcuts on the numeric keypad for switching to each view. They are:
Top View: NUM7
Front View: NUM1
Side (Right) View: NUM3
Camera View: NUM0
Also, by holding the CTRL key at the same time as pressing the numeric keypad, you get the opposite view. Thus:
Bottom View: Ctrl-NUM7
Back View: Ctrl-NUM1
Side (Left) View: Ctrl-NUM3
Ctrl-NUM0 gives you a message "Object as Camera". I guess this is the back of the camera, which isn't too useful, since you won't see anything.
NUM5 toggles between orthographic and perspective, for any view.
To join windows, drag the cursor to the border of the windows to join. When the cursor changes to a double arrow, Right Click and select Join Areas. You'll see a huge arrow, which tells you in what direction the joining will take place. Press Enter to join the windows. You can join either horizontally or vertically.
One last point. If the view is not one of the standard views, say, you rotate your view using the middle mouse button, or alt-Left mouse button if you have turned on 3D button emulation in your preferences window, Blender calls that view "User", which means you chose your own special, tilted view.
Saturday, September 12, 2009
Blender College Course
Hi. This is Ira Krakow. The purpose of this video is to make you aware of a complete, free, Blender 3D course. The course was, and possibly still is, taught by Neal Hirsig, an instructor at Tufts University. From the Web site, it appears that he taught it from 2006 through 2008, and that Tufts University students received college credit for it.
A disclaimer. I don't know Neal Hirsig. I have no affiliation with him or Tufts University. My only motivation is that I wanted to learn Blender 3D and that I found that his course helped me get started up the learning curve, which I think is quite steep. I found Neal's presentation to be simple, concise, and easy to follow. Neal's experience is in stage set design. I found that his explanation for concepts like scene lighting and camera placement showed a deep understanding and real world experience.
All the content - the syllabus, learning units, video tutorials, PDF and Zip files for the examples, and student projects - are available at the Web site at:
Blender Course Web Site
(show the home page)
This video is a virtual tour of the course's Web site. I took some screen shots, and will comment on how I navigated through the course.
(Course Objectives)
Here's how Neal describe the course objectives.
General:
The Blender 3D Design course is intended to offer students an introduction to the world of computer generated 3-D modeling and animation. As an introductory course, it provides a basic understanding of the skills and techniques employed by 3-D designers in a wide range of applications. In this online course we will explore basic mesh modeling, applying textures and materials to 3-D objects, lighting, animation and rendering. This course should provide a good basis for further independent study in architectural, engineering and theatrical modeling and game design.
Dual Level:
There are 2 progressive levels of study in this online course: Beginning Level and Intermediate Level. Learning Units 1 through 12 comprise the Beginning Level Course and Learning Units 13 through 24 comprise the Intermediate Level Course (Note: The Intermediate level Course is currently under development.)
Online and Self-Paced:
This course is offered to students online. That is, all of the course material is located on this web site or on other web sites. This course is self-paced meaning that you can pick and choose the Learning Units, Video Tutorials or PDF tutorials as you see fit. The sequence of Learning Units are a suggested path of learning Blender but you are welcome to use this material in any way that suits your purposes.
All the software that you need - Blender, and the optional installation of Python - is free and available from the Web sites Neal cites. Neal also describes the hardware requirements, and states that a 3 button mouse is required. Actually, I found that I could use Blender with only a 2 button mouse on a laptop. However, you need to activate the Emulate 3 Button Mouse button - there's a video in the course called Blender for Laptops that shows you how. What happens is that Alt-Left click becomes the equivalent of using the middle mouse button. It's a bit awkward, given the combination of keys that Blender often requires, but it's not impossible. So if you have a 2 button mouse, it's really up to you whether or not to get a 3 button mouse just to use Blender.
(Learning Units)
The course is divided into Learning Units, each learning unit consisting of an introduction, a series of videos, and, for many of them, some projects to give you practice. The 12 learning units for the Beginning Level course are complete. This is the course that we're taking. A good way to proceed, to paraphrase the Mad Hatter said to Alice in Alice in Wonderland, just begin at the beginning, continue until you get to the end, and then stop.
It appears that Neal was thinking about doing an intermediate level course, because there is a link to it. However, the link points to a page that says the course is in progress, and since the last update was in April, 2008, it doesn't appear that the course will be ready any time soon.
(Blender PDF Tutorials)
All the assignments are available at this Web site. These include a PDF file detailing how to build the object or scene, a ZIP file containing any files, such as JPEG images needed for textures or background, and the .blend file containing the completed assignment, so that if you get stuck, you can see how your project should have turned out. I found that it might take two or three tries to complete the assignment successfully, but in the process you learn a lot.
(Blender 3D Course)
There are about 150 Blender video tutorials, grouped by topics from the basic Blender UI, and editing meshes, to more complicated topics, many not covered in the learning units, such as box modeling a frog, texture gradients, and importing and exporting between Blender and Google Earth. A great review tool is to simply watch a video a few times, and then try to follow along in Blender. This reinforces your Blender skills quickly.
(Blender 3D Design Projects)
Neal assigned student these projects: a Magic Sword, a Robot, a la Crate and Barrel, Animal Planet, and Architectural Modeling. You can read the assignment by clicking the link from this window...
(Magic Swords)
...and you can see the student's results, either as a Flash demo, or in many cases, you can download the .blend file.
Here are some renderings from the Magic Swords assignment.
(Cheat Sheet)
The Web site includes a handy "cheat sheet" of most of the Blender hotkeys. This is useful because Blender has a bewildering number of key combinations as shortcuts and hotkeys. You can also download and/or print the cheat sheet as a PDF.
(FINALE)
So...go to
Tufts University Blender Course.
or Google Free Blender 3D Course. When I did it, the link was right at the top. Happy blending!
Labels:
3D Animation,
blender,
course,
free,
Tufts,
University,
video
2.49a Color Picker
If you've used any imaging software such as Photoshop, you're probably familiar with selecting a color using the RGB sliders. Of course, you can do this in Blender as well. However, there is a feature called the Color Picker which gives you a number of other ways of choosing colors. Anywhere Blender asks you for a color, you can use the color picker.
We start by firing up Blender with its default scene. We're going to delete the default cube (right click to select, then X or the delete key to delete), and add a UV Sphere (Space - Add - Mesh - UVSphere). The standard way of selecting a color is to use the RGB sliders. We'll add a Material by selecting the UVSphere (Right Click) in Object Mode. To add a material, click the F5 (Shading) button, then the Materials button. Go to solid mode (press the Z key if you are in wireframe mode) so we can see the color. Then click the Add New button. To make the material red, drag the R slider all the way up to 1 and the G and B sliders all the way down to 0.
Another way to choose a color is by the combination of Hue, Saturation, and Value, or HSV. The color picker lets you do this either visually or by using the sliders in a similar fashion as RGB.
The rectangle to the left of the Col text has turned red to show the UVSphere's color. Left click on it to bring up the Color Picker.
Drag the little circle on the color picker swatch to change the hue. Dragging to the right increases the hue value from 0 to 1. Dragging to the left decreases the hue value from 1 to 0. As you drag, notice that the Hue settings, on the right, change as well.
There are two boxes, in the lower right part of the color picker. The lower box shows the old color. The box on top of it shows the new color. The color hasn't been applied yet. There are two ways to apply the color. You can drag the cursor out of the color picker box, or you can press Enter. In either case, the color is applied and the new color shows in the color rectangle.
Click on the color rectangle to bring up the color picker. You can also drag the little circle in the Saturation and Value square. The saturation ranges from 0 to 1 along the y axis, and the value ranges from 0 to 1 along the x axis. Note how the saturation and value sliders change as you move the circle. Drag the cursor out of the color picker into the 3D viewport to select the color.
Click on the color rectangle to bring up the color picker. There's another way to choose a color, by direct entry of a hexadecimal RGB value. Each RGB value can range from 0 to 255, which is 00 to FF in hexadecimal. Here's a cream color, for example, with a hexadecimal value of FFCC99. We can enter this value in the hexadecimal value area. Again, we drag the cursor out of the color picker into the 3D viewport to select the color.
Click on the color rectangle to bring up the color picker again. There are 16 presets which let you store custom colors in the color picker. You can select a color by clicking on one of the presets. Or, you can create your own preset, which Blender saves between sessions. That way, you can create your own palette. we'll create a color and then select a preset rectangle, then ctrl-left click to create our custom preset.
Finally, the Sample button lets you select a color from anywhere within your Blender screen. After you press the Sample button the cursor turns into an eyedropper. Move the eyedropper anywhere within Blender and then left click to select the color that way.
You can use the Sample button, combined with the Image Browser, to sample a color from an image on your hard drive. Split the screen (position the cursor on the border, then right click and select Split), choose the Image Browser. Navigate to the directory containing your images. Then go back into the Color Picker, click the Sample button, and sample an image from the thumbnails shown on the Image Browser.
Blender's color picker gives you a number of ways of choosing colors beyond using the RGB sliders. You can select from the hue swatches, from the Saturation and Value square, or enter the HSV values directly into the color picker. You can enter hexadecimal RGB value. Or you can sample a color by pressing the Sample button.
- Other videos:
- Neal Hirsig Blender Color Picker Tutorial
Labels:
2.49a,
3D Animation,
blender,
color,
picker,
Script,
Video Tutorial
Subscribe to:
Comments (Atom)